The Ultimate Birthday Cake – Easy, Stunning & Totally Show-Stopping
Introduction
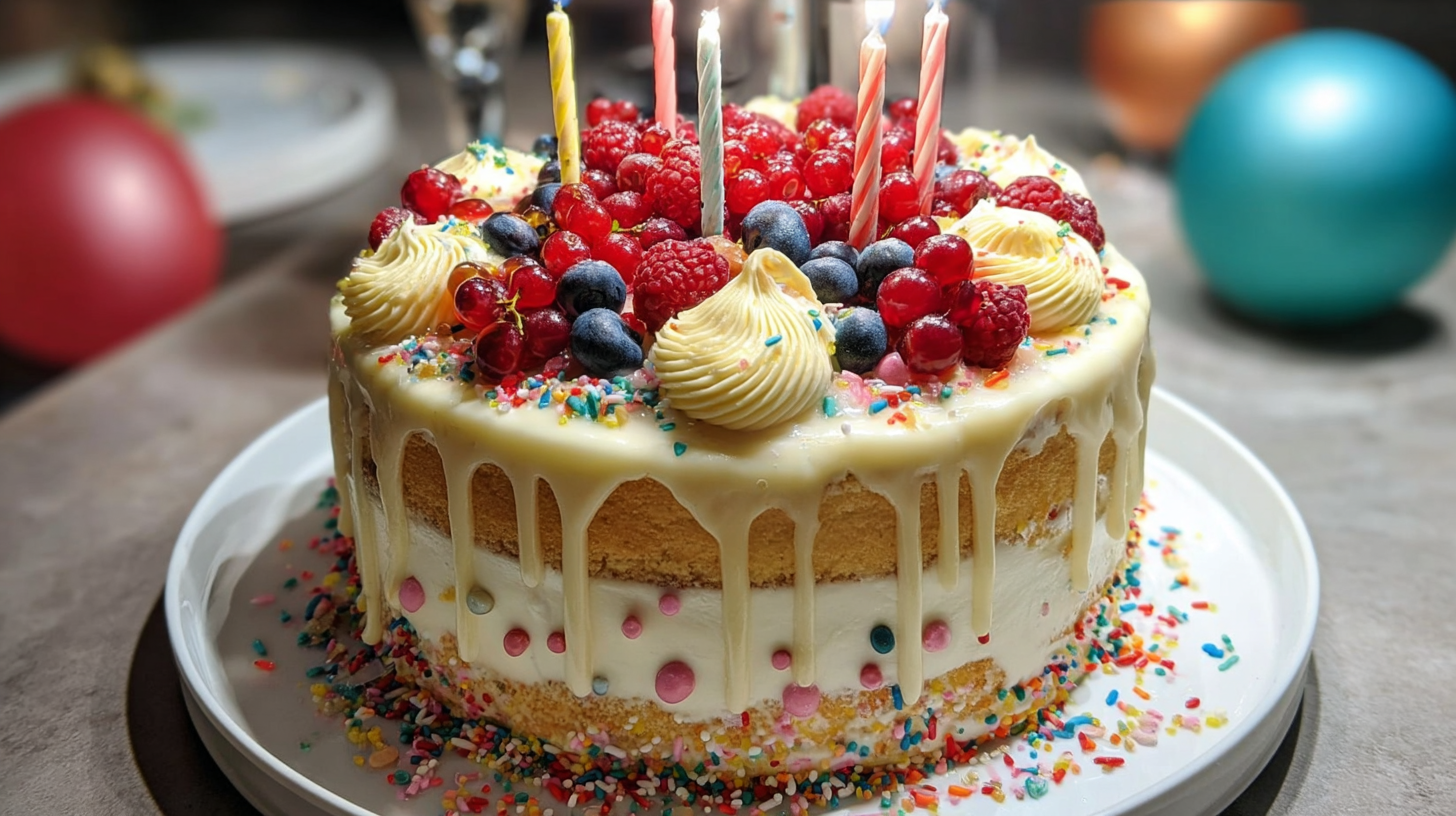
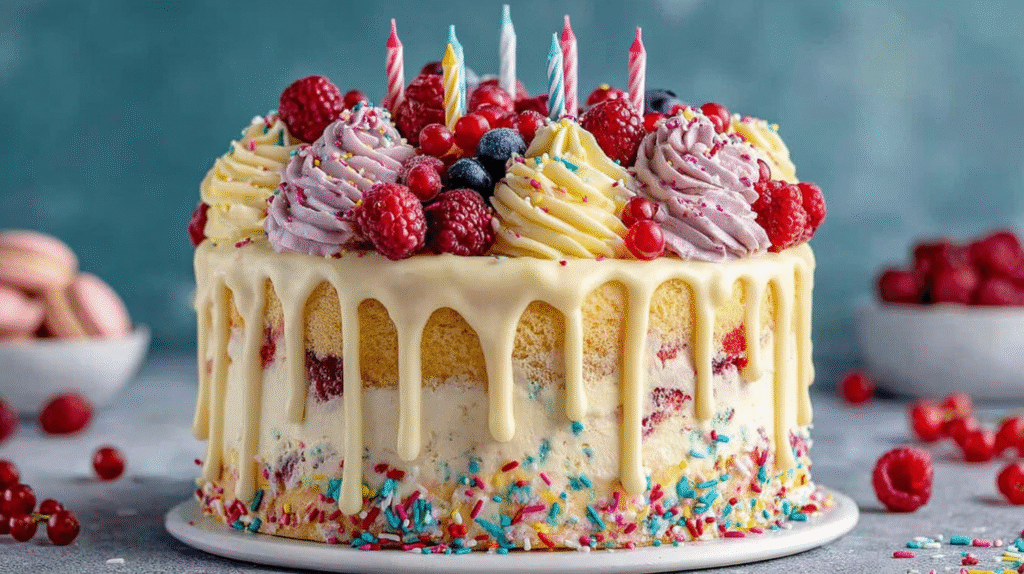
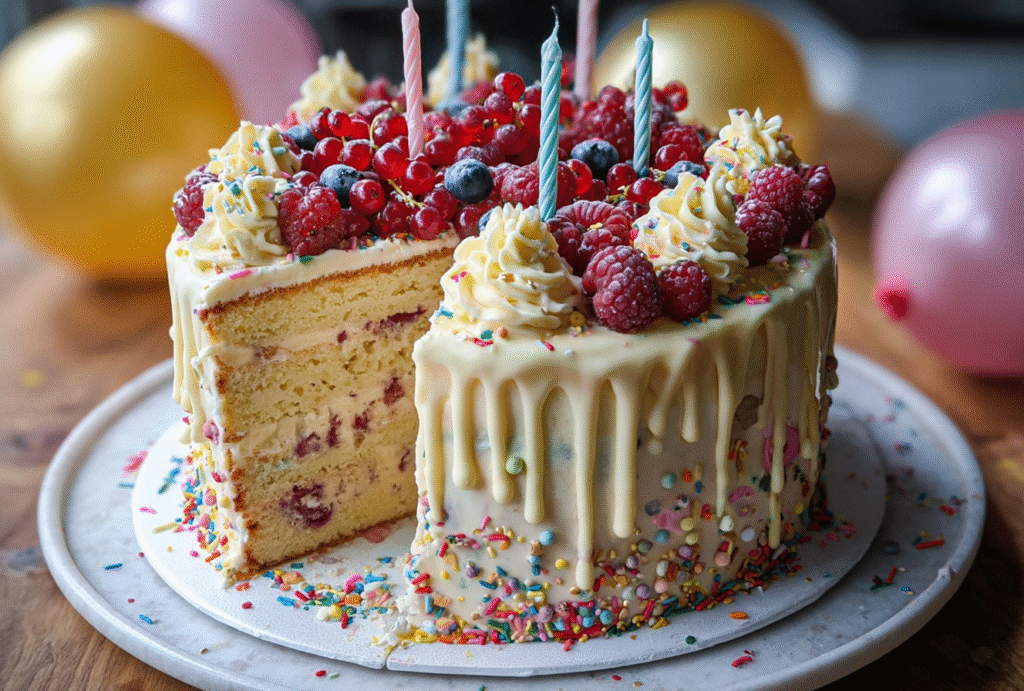
There are birthday cakes, and then there is the birthday cake—the kind that makes people pause, pull out their phones for photos, and crowd around for the first slice. This is that cake. The Ultimate Birthday Cake is a vision of celebration and joy: soft, fluffy vanilla sponge layers stacked high with silky buttercream frosting, crowned with a gorgeous white chocolate drip and plenty of festive sprinkles.
Whether you’re hosting a child’s birthday party, organizing a baby shower, or planning an elegant dinner celebration, this cake fits the bill. It’s versatile, easy to customize, and most importantly, it tastes even better than it looks. What began as a simple family tradition has evolved into a signature centerpiece for every occasion in my home. It’s the cake I’m always asked to make—and the one I never tire of baking.
Perfect for beginner bakers and experienced decorators alike, this cake takes classic ingredients and transforms them into something truly show-stopping. And while the layers and decoration give it a bakery-style finish, the steps are simple and the results are always spectacular.
Whether you’re celebrating a milestone, baking for someone you love, or just treating yourself to a slice of joy, this cake delivers. Get ready for a new go-to recipe that will become the centerpiece of every celebration.
Why You’ll Love This Recipe
This birthday cake checks every box for flavor, appearance, and ease of preparation. Here’s why it deserves a permanent place in your recipe collection.
Easy But Impressive
Despite its polished look, the method behind this cake is incredibly straightforward. The batter mixes in one bowl, the frosting whips up quickly, and the glaze only takes a minute. Yet, the result looks like it came from a boutique bakery window.
Classic Flavor with a Festive Twist
A moist, buttery vanilla sponge never goes out of style. Add in a handful of rainbow sprinkles and you have an instant funfetti effect that delights both kids and adults. Pair it with creamy vanilla buttercream for a classic flavor combination that never disappoints.
Perfect for All Ages and Occasions
From toddler birthday parties to elegant bridal showers, this cake suits any audience. Keep it playful with bold colors and sprinkles or go refined with fresh berries and pastel tones.
Customizable for Any Theme
The white chocolate drip can be tinted to match party colors, the buttercream can be flavored and colored as desired, and the decorations can range from whimsical to sophisticated.
Make-Ahead Friendly
The cake layers can be baked and frozen in advance, the frosting keeps beautifully in the fridge, and even the white chocolate drip glaze can be prepared ahead of time. This makes the entire process stress-free and party-ready.
Ingredients You’ll Need
For the Vanilla Sponge Cake
- 2 ½ cups all-purpose flour
- 2 ½ teaspoons baking powder
- ½ teaspoon salt
- 1 cup (2 sticks) unsalted butter, softened
- 1 ¾ cups granulated sugar
- 4 large eggs, room temperature
- 1 tablespoon vanilla extract
- 1 cup whole milk
- ¼ cup rainbow sprinkles (optional, for a funfetti-style cake)
For the Silky Buttercream Frosting
- 1 cup (2 sticks) unsalted butter, softened
- 4 cups powdered sugar
- 2 tablespoons heavy cream or milk
- 1 tablespoon vanilla extract
- ¼ teaspoon salt
For the Showstopping Drip Glaze
- ½ cup white chocolate chips
- ¼ cup heavy cream
- Gel food coloring (optional, to match your theme)
For Decoration
- Rainbow sprinkles
- Candles
- Fresh berries (optional, for an elegant finish)
Step-by-Step Instructions
Step 1: Make the Vanilla Sponge Cake
Preheat your oven to 350°F (175°C). Grease and line two 8-inch round cake pans with parchment paper for easy removal.
In a medium bowl, whisk together the flour, baking powder, and salt. Set aside.
In a large bowl, use a hand mixer or stand mixer to beat the softened butter and sugar together on medium speed for 2 to 3 minutes, until the mixture is light and fluffy.
Add the eggs one at a time, beating well after each addition. Stir in the vanilla extract.
With the mixer on low, add the dry ingredients in three additions, alternating with the milk, starting and ending with the dry. Mix until just combined.
If you’re using rainbow sprinkles for a funfetti effect, gently fold them into the batter with a spatula.
Divide the batter evenly between the two pans and smooth the tops with an offset spatula or spoon.
Bake for 28 to 30 minutes, or until a toothpick inserted into the center of each cake comes out clean.
Let the cakes cool in their pans for 10 minutes, then carefully turn them out onto a wire rack to cool completely.
Step 2: Make the Silky Buttercream Frosting
In a large bowl, beat the softened butter on medium-high speed until smooth and creamy, about 2 minutes.
Gradually add the powdered sugar, 1 cup at a time, beating well after each addition.
Add the vanilla extract, salt, and heavy cream. Increase the speed to medium-high and whip the frosting for 3 to 5 minutes until light and fluffy.
Adjust consistency as needed. Add more powdered sugar to thicken, or a splash of cream to loosen the texture.
Step 3: Assemble the Cake
Place one of the cooled cake layers on your serving plate or cake stand.
Spread a thick layer of buttercream evenly over the top using an offset spatula.
Place the second cake layer on top and gently press down to level.
Apply a thin crumb coat over the entire cake to seal in any loose crumbs. Chill for 15 minutes to set.
Frost the cake with a generous second layer of buttercream, smoothing it evenly over the top and around the sides. A bench scraper or cake comb can help create sharp edges and a polished finish.
Step 4: Make the Drip Glaze and Decorate
In a microwave-safe bowl, combine the white chocolate chips and heavy cream. Microwave in 15-second intervals, stirring after each, until melted and smooth.
If using food coloring, add a few drops and stir until the desired color is reached.
Let the glaze cool for a few minutes so it thickens slightly before applying.
Using a spoon or squeeze bottle, carefully drizzle the glaze around the edge of the cake, letting it drip naturally down the sides.
Pour the remaining glaze over the top of the cake and gently spread it out to cover the surface.
Finish with rainbow sprinkles, birthday candles, and, if desired, fresh berries or edible flowers.
Variations and Substitutions
This birthday cake is a blank canvas for creativity. Try some of these fun variations:
Chocolate Version
Replace ½ cup of flour with unsweetened cocoa powder to create a rich chocolate sponge.
Lemon or Orange Twist
Add 2 tablespoons of citrus zest and substitute lemon or orange extract for the vanilla to brighten up the flavor.
Different Fillings
Add a layer of raspberry jam, lemon curd, or chocolate ganache between the cake layers for added flavor and surprise.
Vegan Option
Use plant-based butter, almond milk, and flax eggs. Choose vegan sprinkles and dairy-free white chocolate for the glaze.
Gluten-Free Alternative
Use a 1-to-1 gluten-free flour substitute and follow the same instructions. The texture will remain soft and fluffy.
Elegant Finish
Skip the sprinkles and top the cake with sugared flowers, edible gold flakes, or dark chocolate curls for a more refined look.
How to Serve the Ultimate Birthday Cake
This cake is designed to make a statement, so don’t hold back when it comes time to serve.
Use a long, sharp knife dipped in hot water to get clean slices. Wipe the knife between each cut for a tidy presentation.
Serve slices on small dessert plates with a fork and napkin. For a dessert platter effect, pair with scoops of vanilla ice cream or a dollop of whipped cream.
Garnish each plate with extra sprinkles, a fresh berry, or a mint sprig for added flair.
This cake pairs beautifully with coffee, tea, milk, or celebratory drinks like sparkling cider or Champagne.
Recipe Tips
- Use room-temperature ingredients for best results. Cold eggs or butter can cause the batter to curdle or not mix smoothly.
- Don’t overmix the batter once the flour is added. Overmixing can lead to a dense cake.
- Chill the cake after the crumb coat to make final frosting easier and cleaner.
- Make sure the drip glaze is the right consistency before applying—it should be warm enough to flow, but thick enough to cling.
- Use a turntable for more control while frosting and decorating.
- Add a pinch of salt to the buttercream to balance out the sweetness and enhance flavor.
Storage and Reheating Tips
Store the assembled cake covered in the refrigerator for up to 5 days.
To freeze, wrap unfrosted cake layers tightly in plastic wrap and store in an airtight container for up to 1 month.
To serve leftover slices, bring them to room temperature for 30 minutes or microwave briefly (10 to 15 seconds) to soften the buttercream.
Cooking Notes
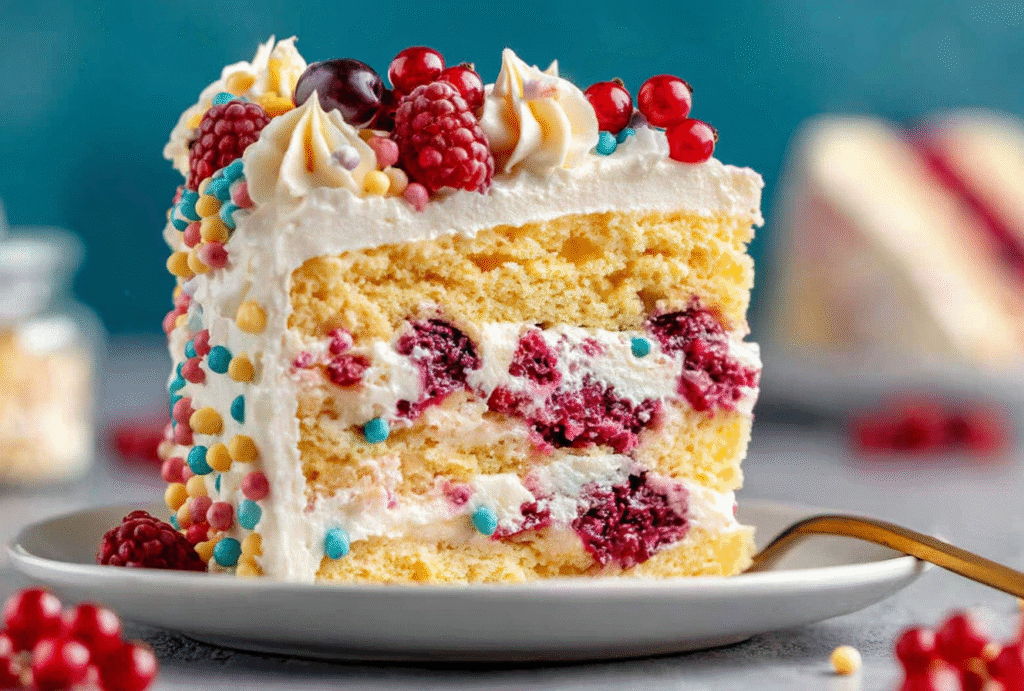
- The recipe yields two thick 8-inch layers, perfect for a tall and impressive cake.
- You can split each baked cake into two thinner layers for a four-layer version using a serrated knife.
- Add sprinkles just before baking to avoid them sinking or bleeding color.
- You can double the recipe to serve a larger crowd or for multi-tiered birthday cake designs.
- This cake can be made one day ahead and decorated on the day of serving for best texture and flavor.
Nutritional Information (Per Serving)
- Calories: 520
- Total Fat: 29g
- Saturated Fat: 18g
- Carbohydrates: 65g
- Sugars: 48g
- Protein: 4g
- Sodium: 170mg
Recipe Details
- Prep Time: 30 minutes
- Cook Time: 30 minutes
- Decorating Time: 30 minutes
- Total Time: 1 hour 30 minutes
- Yield: 12 to 14 servings
- Difficulty: Easy to Intermediate
FAQs
Can I make this cake ahead of time?
Yes. The cake layers can be made 1 to 2 days in advance, wrapped well, and refrigerated or frozen. You can also prepare the buttercream and glaze in advance.
Can I use boxed cake mix instead of homemade?
Yes, for a shortcut, use two boxes of your favorite vanilla or funfetti cake mix. The homemade frosting and glaze will still give it a from-scratch finish.
How do I prevent the glaze from running too far?
Let the glaze cool slightly before using. It should be thick enough to drip slowly but still spreadable. Test it on the back of a spoon or side of a glass first.
Can I make this recipe into cupcakes?
Yes. This recipe makes about 24 cupcakes. Reduce baking time to 18 to 22 minutes. Frost and decorate the same way.
What if I don’t have white chocolate for the glaze?
You can use candy melts, or make a simple icing glaze with powdered sugar, milk, and food coloring. Ganache made with dark or milk chocolate also works.
Can I use different sized pans?
You can use 9-inch pans, but the layers will be thinner and bake slightly faster. Always test with a toothpick for doneness.
How do I transport the cake?
Chill the cake to firm it up, place it in a cake carrier or tall box, and keep it on a flat surface during travel. Decorate with fragile toppings like berries after arriving at the party.
Conclusion
The Ultimate Birthday Cake is the kind of recipe that never lets you down. It’s beautiful, it’s delicious, and it has that magical quality of making people smile before they even take the first bite. Whether you go bold with sprinkles and colors or keep it minimal and elegant, this cake rises to the occasion.
The soft vanilla layers, creamy buttercream, and dramatic drip glaze are a celebration in every slice. And while it looks impressive, it’s surprisingly easy to make, even for beginner bakers. From weeknight birthday dinners to grand weekend parties, this cake brings joy, flavor, and just the right amount of sparkle.
Try it once, and you’ll find yourself making it again and again. Because every celebration deserves something truly special—and this cake delivers exactly that.
Let this become your go-to celebration cake, and may every slice be as memorable as the moment it celebrates.
Would you like this article exported as a Word doc, blog post HTML, or a formatted PDF?