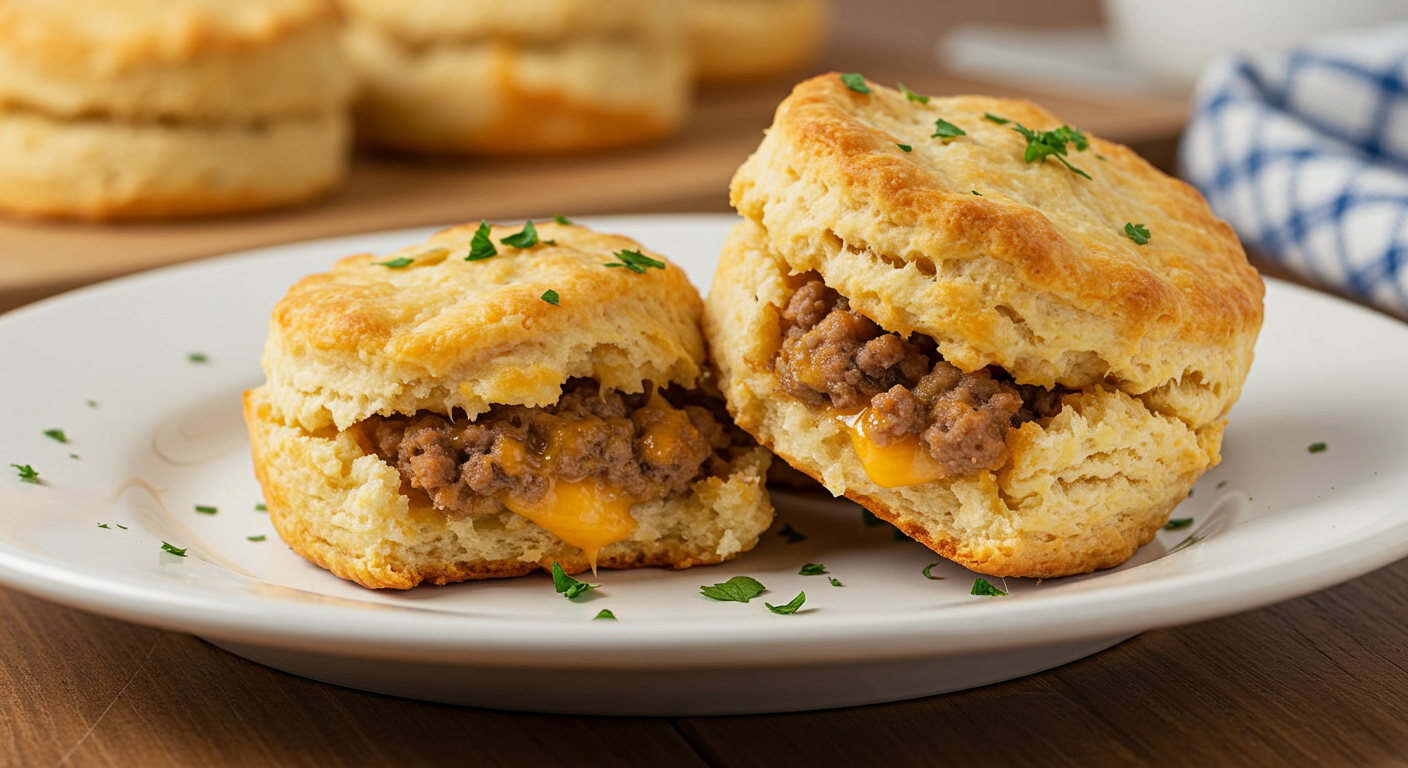
Cheeseburger Bombs Recipe: A Fun and Tasty Twist
Family gatherings are special, and the right dish can make them even better. Imagine everyone enjoying cheeseburger bombs, a flaky, golden treat. These homemade cheeseburgers are fun to make and full of flavor.
They turn your favorite burger into delicious little pockets. With one bite, you’ll taste seasoned beef, melted cheese, and a garlicky Parmesan crust. It’s a taste that will make everyone want more.
These cheeseburger bombs are perfect for any time, whether it’s a weeknight dinner or a party. They’re quick to make, ready in about 30 minutes. You can also change up the fillings to please everyone’s taste. Making them together in the kitchen creates special moments and memories.
Table of Contents
Why You’ll Love Cheeseburger Bombs
Cheeseburger are irresistible for a reason. They mix juicy ground beef, melty cheddar, and crispy bacon in a buttery biscuit shell. Ready in just 35 minutes, they’re perfect for busy nights or spontaneous gatherings.
Quick and Easy to Make
This recipe is simple and fast. Prepping and assembling takes little time. You can bake, smoke, or air fry them, fitting your cooking style.
Prep them ahead for easy meal planning. Store them in the fridge for up to 24 hours before baking.
Perfect for Any Occasion
Cheeseburger are great for any event. They’re perfect for game days, BBQs, or quick meals. You can customize them with glazes and add-ins for any taste.
Try honey mustard or sriracha BBQ glazes. Pair them with taco crescent rings for a fun twist.
Kid-Friendly and Customizable
Kids love cheesy beef bombs. Let them pick toppings like pickles or onions. You can even swap BBQ sauce for sugar-free ranch or blue cheese.
Ingredients for Cheeseburger Bombs
Making delicious Cheeseburger Bombs starts with the right ingredients. Knowing what you need helps create a Stuffed Cheeseburger that’s full of flavor. Each part is key to making these Cheesy Burger Bombs a hit with everyone.
Essential Filling Ingredients
- 1 pound ground beef
- 1 small yellow onion, finely diced
- 1 tablespoon hamburger seasoning
- 1 teaspoon seasoned salt
- 1 teaspoon black pepper
- ½ cup finely diced dill pickle
- ½ cup sharp cheddar cheese, shredded
- 2 cloves garlic, minced
- ½ cup Parmesan cheese, diced
- 1 cup cheddar cheese, cubed
Assembly Ingredients
- 1 can (8-count) refrigerated biscuits, not flaky
- 1 can (16.3 oz) biscuit dough
- ¼ cup unsalted butter, melted
- 2 tablespoons butter, melted
- 1 tablespoon parsley, chopped
- 2 teaspoons sesame seeds
Garlic Parmesan Butter Components
To add an extra flavor to your Cheeseburger Bombs, make a garlic Parmesan butter. You’ll need:
- ¼ cup unsalted butter, melted
- ¼ teaspoon garlic powder
These ingredients are vital for making the ultimate cheesy treat. They offer a rich, savory taste with every bite.
Preparing the Cheeseburger Filling
Creating the perfect filling is key to a memorable cheeseburger experience. Follow these steps to make your homemade cheeseburger burst with flavor. Start by cooking the ground beef and adding layers of flavor for a delicious taste.
Cooking Ground Beef
Start by cooking 1 pound of 85%-lean ground beef in a large skillet over medium heat. Once it starts to brown, add ½ chopped onion and 2 minced garlic cloves. Keep sautéing until the beef is fully cooked and the onion is translucent, about 5-7 minutes. Remember to drain off any excess grease for a healthier filling.
Mixing in the Flavorings
Once the beef mixture is ready, add 2 tablespoons of ketchup, 1 teaspoon of Worcestershire sauce, and 2 finely chopped dill pickles. For an extra savory twist, add crispy bacon. Cook 4 slices of bacon until crisp, cut them into ¼-inch pieces, and mix them with the beef. This will add depth and richness to your homemade cheeseburger bombs.
Tips for the Perfect Filling
To get a scrumptious filling, marinate the ground beef mixture for about an hour before using it. This will enhance the flavor. Feel free to try different cheeses like mozzarella or pepper jack for varied tastes. You can also add jalapeños for heat or caramelized onions for sweetness. These tips will help you create the ultimate filling that makes your cheeseburger a must-try.
Assembling Your Cheeseburger Bombs
Assembling your Cheeseburger Bombs needs careful attention for a great result. This fun process makes delicious bites that will wow everyone. Start by shaping the biscuit dough right and using good filling methods. Getting the Cheeseburger assembly right is key for a tasty texture and flavor.
How to Shape the Biscuit Dough
Start with a can of refrigerated biscuit dough, found in most stores. Preheat your oven to 350°F (190°C) and line a baking sheet with parchment paper. Then, flatten each biscuit into a 4-inch circle with your hands or a rolling pin. This is important to fit the tasty filling inside.
Filling and Sealing Techniques
After preparing the biscuit discs, it’s time to add the cheeseburger filling. Put about 2 tablespoons of beef mixture in the center of each dough circle. Make sure not to overfill. Fold the dough over the filling and pinch to seal into a ball.
Sealing well keeps the filling inside while baking. Brush the tops with garlic Parmesan butter for extra flavor. For a richer look, brush with egg wash and sprinkle sesame seeds.
Baking the Cheeseburger Bombs
The baking process is key to getting the right flavor and texture in Cheeseburger. It’s important to keep the oven at the right temperature and bake for the right amount of time. This will help them turn golden, making them look and taste amazing.
Optimal Oven Temperature and Timing
First, heat your oven to 375°F. This temperature is perfect for baking Cheeseburger Bombs. It lets the biscuit dough rise and the filling cook evenly.
After shaping and filling the dough, put the bombs on a baking sheet. Make sure they’re seam side down to avoid opening. Bake them for 12 to 15 minutes. Watching them closely will help them stay fluffy.
How to Achieve Golden Perfection
To get your Cheeseburger Bombs golden and fluffy, brush them with melted garlic Parmesan butter before baking. This step adds flavor and makes them look great. The butter will caramelize, creating a tasty crust.
Strive for that perfect golden brown color. Your Golden Cheeseburger will be the stars of any event!
| Step | Details |
|---|---|
| 1. Preheat Oven | Set your oven to 375°F. |
| 2. Bake Time | 12-15 minutes for optimal texture. |
| 3. Brush with Butter | Apply garlic Parmesan butter for golden color. |
| 4. Check Doneness | Look for a deep golden brown finish. |
Variations on Cheeseburger Bombs
Cheeseburger Bombs are a blank canvas for many flavors. You can make them spicy, smoky, or vegetarian. Try these ideas to make your kitchen a place of creativity and fun.
Spicy Cheeseburger Bombs
Love a little heat? Spicy Cheeseburger are for you. Add chopped jalapeños and pepper jack cheese to the meat. Serve with ranch or spicy ketchup for an extra kick.
Bacon Cheeseburger Bombs
For a taste of luxury, try Bacon Cheeseburger Bombs. Mix ground beef with crumbled bacon for a savory delight. Add pickles or onions for more flavor. They’re great for any occasion.
Vegetarian Options
Looking for a veggie option? Vegetarian Cheeseburger Bombs are a tasty choice. Use mushrooms, lentils, and nuts instead of meat. Add vegetarian bacon for crunch. Try mozzarella or Swiss cheese for a unique taste.
| Variation | Main Ingredients | Complementary Suggestions |
|---|---|---|
| Spicy Cheeseburger Bombs | Ground beef, jalapeños, pepper jack cheese | Ranch dip, spicy ketchup |
| Bacon Cheeseburger Bombs | Ground beef, crumbled bacon, cheddar cheese | Diced onions, pickles |
| Vegetarian Cheeseburger Bombs | Minced mushrooms, lentils, vegetarian bacon | Various cheese options, extra veggies |

Serving Suggestions for Cheeseburger Bombs
Make your Cheeseburger Bombs experience even better with creative serving ideas. These ideas pair well with dipping sauces and side dishes. Every bite will be as good as the last.
Ideal Dipping Sauces
Find the perfect dipping sauces to boost your Cheeseburger taste. Here are some great options:
- Marinara Sauce
- Ranch Dressing
- Spicy Aioli
- BBQ Sauce
- Garlic Aioli
- Fry Sauce
- Ketchup
- Cheddar Cheese Sauce
Each sauce has its own special taste. Try mixing them for a fun twist on your meal.
Pairing with Side Dishes
Choose side dishes that make your meal even better. Here are some tasty choices:
- Air Fryer French Fries
- Crispy Onion Rings
- Fresh Salad
- Pickle Spears
- Roasted Vegetables
- Sweet Potato Fries
These sides balance the rich taste of the bombs. A fresh salad adds a nice contrast.
For drinks, try cold soda, lemonade, or a milkshake. They’re perfect for game nights or family dinners. These ideas will make everyone happy and wanting more.
Storing and Reheating Your Cheeseburger Bombs
Learning how to store and reheat your leftover cheeseburger bombs can make them even better. The right methods keep the flavors and textures just right. This way, you can enjoy them as if they were fresh.
How to Store Leftovers
For the best taste, store your leftover cheeseburger in an airtight container in the fridge. This keeps them fresh for 2-3 days. If you want to freeze them, flash freeze on a sheet pan until firm. Then, put them in a Ziploc bag for up to 6 months.
Reheating Techniques
There are many ways to reheat cheeseburger bombs. First, thaw any frozen bombs in the fridge overnight. For a quicker method, bake them frozen at 350°F for 15-20 minutes.
For a fast option, use the microwave until they’re warm. Or, try an air fryer or bake at 350°F for 10-15 minutes. This will make them taste great again for a second time.
Tips and Tricks for the Best Cheeseburger Bombs
Making the perfect cheeseburger bombs requires some skills and techniques. Using the Best Cheeseburger Bombs tips can make your cooking better. It also helps avoid leakage in Cheeseburger Bombs. Follow these tips for great results.
Ensuring No Leakage
Sealing the dough well is key to avoid filling leaks. Divide your dough into 2-inch pieces for even cooking. Don’t overstuff with cheese to prevent leaks.
Seal the edges tightly by pinching the dough. This keeps the filling inside during baking. Pan-frying the stuffed meatballs before baking helps lock in flavor and moisture. Keeping the biscuit dough cold improves its texture and prevents leaks.
Using Different Types of Dough
Trying different doughs can add new flavors and textures. Use buttermilk biscuit dough for an easy option or homemade pizza dough for a twist. Fathead dough is great for low-carb versions, and gluten-free dough is perfect for dietary restrictions.
Also, add unique flavors by using different seasonings or cheeses. This way, you can create a variety of cheeseburger bombs.
| Dough Type | Flavor Profile | Best Uses |
|---|---|---|
| Buttermilk Biscuit Dough | Rich and fluffy | Classic cheeseburger bombs |
| Pizza Dough | Chewy and versatile | Italian-inspired flavors |
| Fathead Dough | Low-carb and cheesy | Keto-friendly variations |
| Gluten-free Dough | Adaptable to dietary needs | Inclusive for gluten sensitivities |

Cheeseburger Bombs as Appetizers
Cheeseburger Bombs are a great choice for any gathering. They’re a tasty appetizer that everyone will enjoy. Their small size makes them easy to eat, perfect for parties and events.
These treats offer comforting flavors and are versatile for many occasions. They make your guests’ experience memorable.
Perfect for Parties
For celebrations, you want dishes that taste great and look impressive. Cheeseburger Bombs fit the bill. They make about 24 pieces, perfect for big gatherings.
Preheat your oven to 375°F (190°C). Bake them for 18-20 minutes. This ensures they come out golden brown on top.
Game Day Snack Ideas
For Game Day, you need snacks that are easy to eat while cheering. Cheeseburger Bombs are ideal. Brush the tops with beaten egg and sprinkle sesame seeds for a golden finish.
To add more flavor, pan-fry the meatballs before wrapping them. This reduces cheese oozing and boosts taste.
| Ingredient | Amount |
|---|---|
| Ground Beef (90/10 lean) | 1 lb. |
| Frozen Dinner Rolls | 24 |
| American Cheese | 1/2 lb. |
| Minced Garlic | 1 tsp |
| Onion Powder | 1 tsp |
| Kosher Salt | 1 tsp |
| Pepper | 1/2 tsp |
| Worcestershire Sauce | 1 tbsp |
| Crumbled Bacon | 1/4 cup |
| Shredded Cheddar Cheese | 1/2 cup |
With these ingredients and steps, you can make a delicious snack. It’s perfect for parties and Game Day. Enjoy serving these delightful Cheeseburger Bombs at your next event!
The Fun of Making Cheeseburger Bombs with Kids
Getting your kids involved in the kitchen makes mealtime exciting. It helps them connect with food and creates memories. A Family-friendly Cheeseburger Bombs recipe is great for this, letting kids do fun tasks.
A Kitchen Activity for Family
This recipe uses ingredients kids like, like ground beef, pickles, and cheese. They can help flatten biscuits and seal the fillings. It’s a fun way to cook together.
Plus, the portions are small, so kids can handle and enjoy them. This keeps mealtime relaxed.
Encouraging Creativity in the Kitchen
Adding sesame seeds on top is a hit with kids because of the crunchy texture. Baking is safe, avoiding stovetop dangers. Kids can try different cheeses or meats for a change.
It’s quick to make, taking only about 10 minutes. You can even use puff pastry or crescent rolls for a twist.
Try dipping Cheeseburger Bombs in fry sauce for a fun taste experience. You can store leftovers for up to three days. This recipe is both fun and convenient for families.
Conclusion
In this Cheeseburger Bombs summary, you’ve found a fun and tasty recipe. It’s perfect for any meal. The homemade cheeseburger bombs are filled with seasoned ground beef, parmesan, and cheddar cheese. They’re wrapped in flaky biscuit dough, making them golden and irresistible.
These treats are great for parties, game days, or casual get-togethers. They’re the ideal snack. You can also add your favorite ingredients like onions, bacon, or peppers. Serve them with dips like ranch, marinara, or zesty burger sauce for extra flavor.
Remember, you can make these bombs ahead of time and store them easily. They’re also great for making in large batches. This review is not just about a tasty recipe. It’s also an invitation to get creative in the kitchen. So, get your ingredients ready, roll up your sleeves, and make these tasty bites. Your taste buds will love you for it!
FAQ
What are Cheeseburger Bombs?
How long does it take to make Cheeseburger Bombs?
What ingredients do I need for the filling?
Can I customize the Cheeseburger Bombs?
What should I serve with Cheeseburger Bombs?
How do I store leftover Cheeseburger Bombs?
What is the best way to reheat Cheeseburger Bombs?
Why are Cheeseburger Bombs great for parties?
Can kids help make Cheeseburger Bombs?
What tips can you share for perfect Cheeseburger Bombs?
What’s the recommended baking temperature for Cheeseburger Bombs?

Cheeseburger Bombs Recipe
Ingredients
- 1 lb ground beef
- 1 small yellow onion finely diced
- 1 tbsp hamburger seasoning
- 1 tsp seasoned salt
- 1 tsp black pepper
- ½ cup dill pickles finely diced
- ½ cup sharp cheddar cheese shredded
- 1 can 8count refrigerated biscuits, not flaky
- ¼ cup ½ stick unsalted butter, melted
- ¼ tsp garlic powder
- 2 tsp sesame seeds
- Fry sauce for dipping
Instructions
- Step 1: Preheat & Prepare
- Preheat oven to 375°F (190°C).
- Spray a 10inch ovensafe skillet with nonstick cooking spray.
- Step 2: Cook the Beef Filling
- Heat a medium nonstick skillet over medium heat.
- Add ground beef and onion. Cook, breaking up the beef as it browns.
- Once it starts browning, add:
- Hamburger seasoning
- Seasoned salt
- Black pepper
- Continue cooking until fully browned. Drain excess grease if needed. Remove from heat.
- Step 3: Assemble the Cheeseburger Bombs
- Remove biscuits from the can and flatten each into a 5inch circle using a rolling pin.
- To the center of each biscuit, add:
- 1 tbsp shredded cheddar cheese
- ⅓ cup ground beef mixture
- 1 tbsp diced pickles (optional)
- Pinch the edges of the dough tightly to seal the filling inside.
- Place the sealed biscuits seamside down in the prepared skillet.
- Step 4: Bake
- In a small bowl, mix melted butter with garlic powder.
- Brush the tops of the biscuits with garlic butter.
- Sprinkle with sesame seeds.
- Bake for 2325 minutes, or until golden brown.
- Step 5: Serve & Enjoy
- Let cool slightly before serving.
- Serve warm with fry sauce for dipping.
Notes
Pair with crispy fries, coleslaw, or a fresh salad.
Dipping sauce ideas: ketchup, mustard, ranch, or BBQ sauce. Tips & Variations
Extra cheesy? Add a slice of cheese inside each bomb for a gooey center.
Make it spicy! Add diced jalapeños or a dash of hot sauce.
Sweet & savory twist: Use Hawaiian biscuits for a slightly sweeter flavor.